Editing Documents
If you’re capturing a new document we recommend first capturing it using a standard word processor like Microsoft Word. Once you have the bulk of the document, import it into Indigo.
Indigo looks for structure in a document by looking for keywords such as chapter and part. It can identify different aspects of a document:
- Preface
- Preamble
- Parts and chapters
- Sections, subsections and numbered lists
- Schedules
Note
Indigo ignores presentation details such as font size, bold and italicised text, and indentation because those elements are used inconsistently by different authors. Indigo will apply new presentation rules based on the structure of the document.
Making and Saving Changes
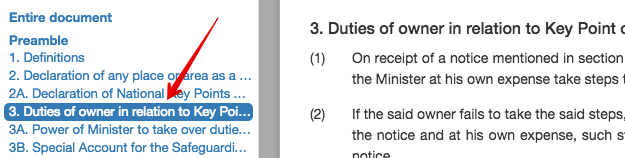
The easiest way to make an edit is to use the Table of Contents on the left part of the document page to find the section in which to make the change.
Click on the heading of the part, chapter or section you wish to edit. Choose the smallest element that contains what you wish to change.
Click the Edit button in the top right corner of the document.

Indigo will show the simple editor. Notice that the content of the editor is the textual content of the section you’re editing, without any formatting and with very simple layout.
Make the changes you require.
Click the green tick at the top-right corner where you clicked the Edit button.

Indigo will process your change and replace the editor with the new content.
- If you’ve made an edit Indigo cannot understand, clicking the green tick will show an error. Correct your edit and try again.
- To abandon your changes, click the X icon near the green tick.
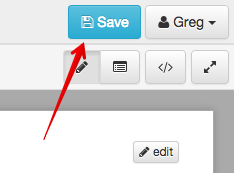
Click the blue Save button to save your changes to the server.
Note
Bear these tips in mind when editing:
- Indigo can take a long time to process large sections. Choose the smallest containing element when editing.
- Use the existing content as a guide for how to format new content.
Editing Structure
Indigo cares about the structure of a document, not font sizes or layout. This means you need to follow a few simple conventions and Indigo will do all the hard work for you.
Here is an example of the simple formatting used by Indigo:
Chapter 8 - Environmental management co-operation agreements

35. Conclusion of agreements

(1) The Minister and every MEC and municipality, may enter into environmental management co-operation agreements with any person or community for the purpose of promoting compliance with the principles laid down in this Act.

[[Section 35(1) inserted by section 7 of Act 46 of 2003]]

(2) Environmental management co-operation agreements must-

(a) only be entered into with the agreement of-

(i) every organ of state which has jurisdiction over any activity to which such environmental management co-operation agreement relates;

(ii) the Minister and the MEC concerned;

(b) only be entered into after compliance with such procedures for public participation as may be prescribed by the Minister; and

(c) comply with such regulations as may be prescribed under section 45.
Indigo understands how to convert this into the XML that represents a chapter, section 35, subsections etc.
Notice that under subsection 1(a) above there is a sublist with items (i) and (ii). We don’t bother trying to indicate that it is a sublist, Indigo will work that out based on the numbering.
You can think of this as focusing on the content of the document and using very simple presentation rules guided by a rough understanding of the structure. Compare this with an editor like Word which focuses heavily on the presentation of the content.
Chapters, Parts, Sections, etc.
Follow these guidelines to tell Indigo about the structure of your document:
Start the preface like this:
PREFACEStart the preamble like this:
PREAMBLEStart a chapter like this:
Chapter 2 - Interpretation
Start a part like this:
Part 1 - Applications
Start a section like this:
1. Definitions
Numbered subsections must have a number in parentheses at the start of the line:
(1) The content of section 1.

(2) The content of section 2.
Subsections or statements without numbers can be written as-is:
A statement without a number.
Numbered sublists must have a number in parentheses at the start of the line:
(a) sublist item a

(b) sublist item b
Start a Schedule like the example below. The number
1, theTitleandHeadingparts are optional, you can leave them out if necessary:Schedule 1 - Title Heading or Schedule - First Schedule Subtitle
Tables
Often a piece of legislation will include tables, for example in Schedules.
The easiest way to edit these is to click the Edit Table button at the top right corner of the table.
Simply type your changes into the table and click Update when you’re done.
Use the buttons in the toolbar to add and remove columns and rows, and to set cells as heading cells.
To merge cells, use the mouse to select the cells and click Merge cells.
To split merged cells, select the cells and click the Merge cells button again.
Editing Tables in the Simple Editor
You can also edit tables in the simple editor. Indigo uses the same text format for tables that Wikipedia uses.
See also
Be sure to read Wikipedia’s tutorial for writing tables.
Use this table generator website to easily start building a new table for a document.
Don’t use class="wikitable" even though they recommend it.
This code:
{|
|-
! header 1
! header 2
! header 3
|-
| row 1, cell 1
| row 1, cell 2
| row 1, cell 3
|-
| row 2, cell 1
| row 2, cell 2
| row 2, cell 3
|}
produces a table that looks like this:
| Header 1 | Header 2 | Header 3 |
|---|---|---|
| row 1, cell 1 | row 1, cell 2 | row 1, cell 3 |
| row 1, cell 1 | row 1, cell 2 | row 1, cell 3 |
Notice how we don’t explicitly make the header row bold. We simply indicate in the structure that those cells
are headers by using ! at the start of the cell’s line instead of the normal |. Indigo will format the cell appropriately.
Telling Indigo to Ignore Special Items
Sometimes it’s useful to be able to tell Indigo not to interpret a line
specially. Do this by starting the line with a backslash \.
This is particularly useful when a paragraph starts with a text that Indigo would normally interpret as a section or subsection. For example:
Fill in this form:

\1. State .......................................
\2. Date Received ..........................
\3. Checked ..................................
\4. Certificate Issued .......................
\5. Certificate No. ..........................
\6. Treasury Receipt No. .................
By starting each line with \ Indigo knows that it shouldn’t treat those
lines as section numbers.
Adding new Chapters, Parts and Sections
You can easily add a new chapter, part or section to a document. To do so:
- edit the chapter, part or section just before where the new one needs to go
- at the bottom, add the new chapter, part or section heading and content
- click the green Update button
Links
Add a link in the text of your document using this syntax:
[link text](http://example.com/page)
That will create a link like this: link text
Images
You can embed an image in your document using this syntax:

That will create an image using the image.png file added to your document as an attachment.
Downloading PDF and Standalone HTML
You can download PDF and standalone (self-contained) HTML versions of a document. These are useful for distribution and archiving. Go to Preview and click the Download button.
Downloaded and PDF documents can have a colophon, which is a page right at the start of the document which contains copyright, ownership and other information. A colophon is automatically chosen for a document based on document’s country.
Note
Administrators can add new colophons through the Admin interface. Click on your name in the top-right corner and choose Site Settings.
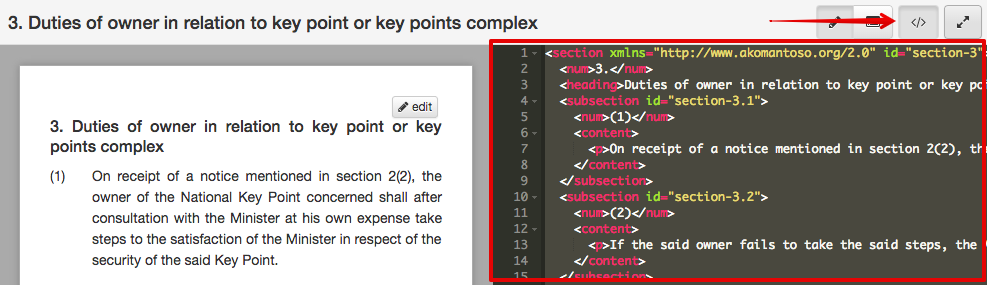
Viewing the XML
It can be useful to see what the Akoma Ntoso for a piece of the document looks like. Click the Show Code button to do this: